

เมื่อลูกค้าได้สั่งซื้อ VPS แล้ว จะได้รับข้อมูลเกี่ยวกับ VPS ทางอีเมลทันทีเมื่อชำระเงินแล้ว
จากนั้นรอประมาณ 10 นาทีก็ใช้งานได้เลยครับ
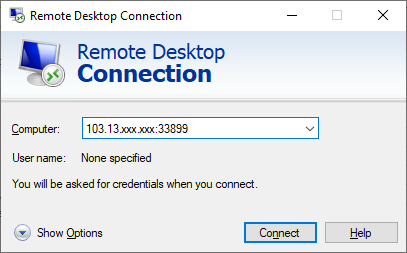
สามารถเข้า Remote แบบนี้ครับ
NOTE: If you ordered your Windows VPS during Thai office hours, then probably we already configured your VPS. You can then skip the steps below.
หมายเหตุ: หากเกิน 20 นาทีแล้วยังเข้าไปไม่ได้ ลูกค้าสามารถเข้าไป Active เองแบบนี้ครับ [ข้ามขั้นตอนนี้หาก remote ติดแล้ว].
- เข้าสู่ระบบลูกค้า [Click] VPS => VPS ของฉัน
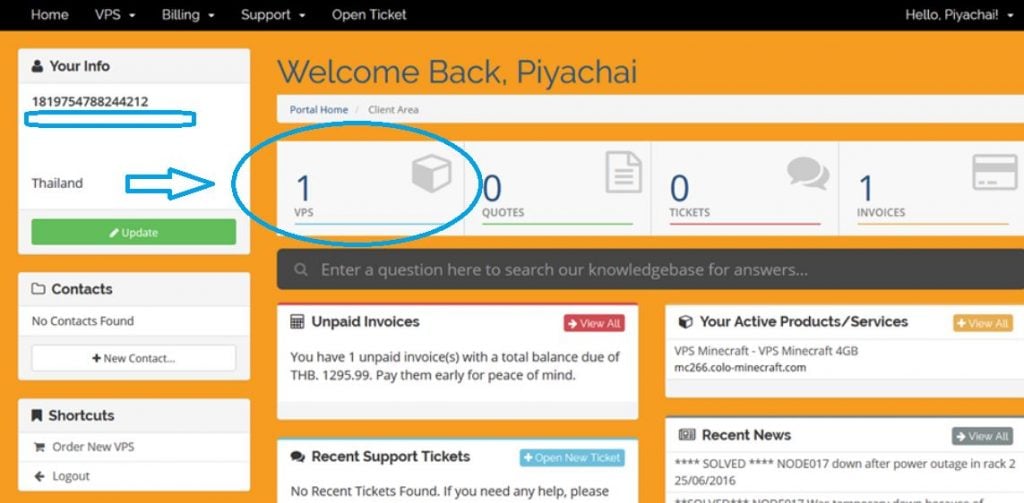

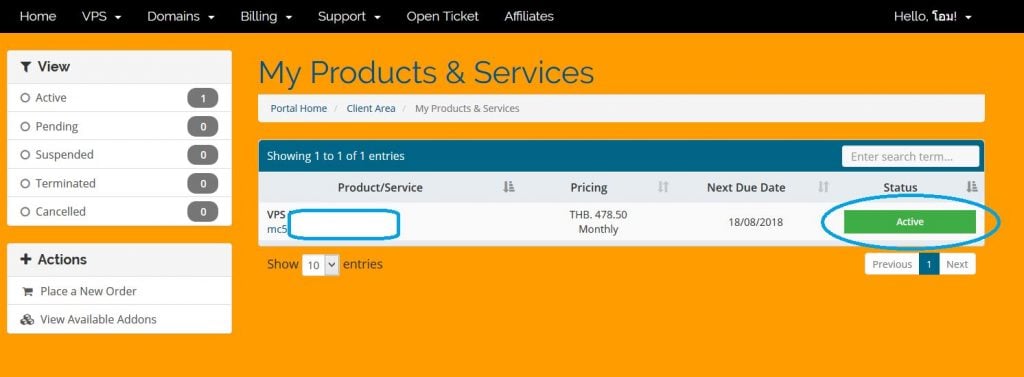
- คลิกที่ Active เพื่อเข้าไปดู VPS ที่เราเลือก

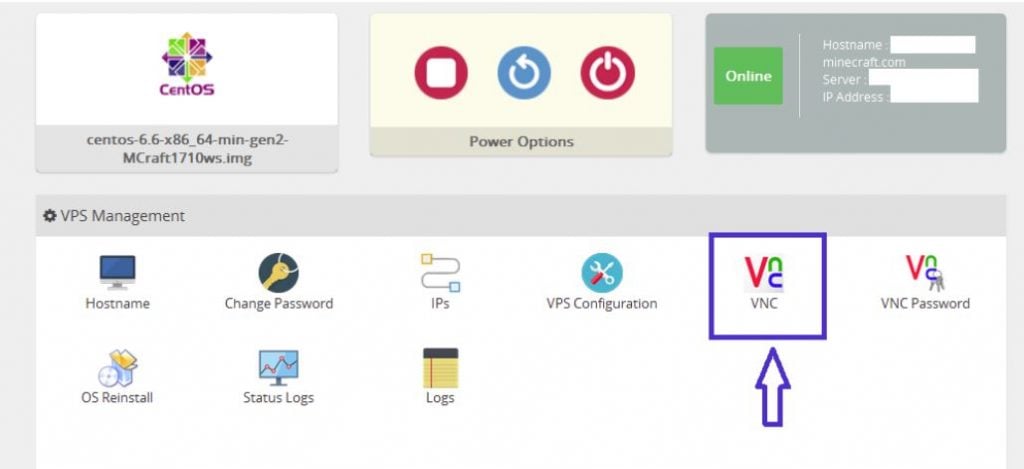
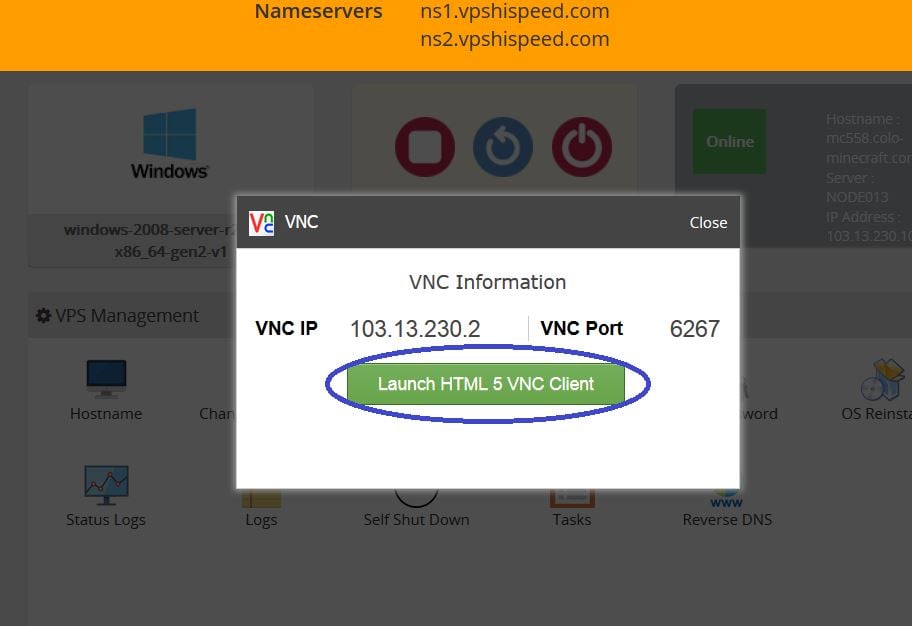
- คลิกตรง VNC

- คลิกที่ Launch HTML5 VNC Client

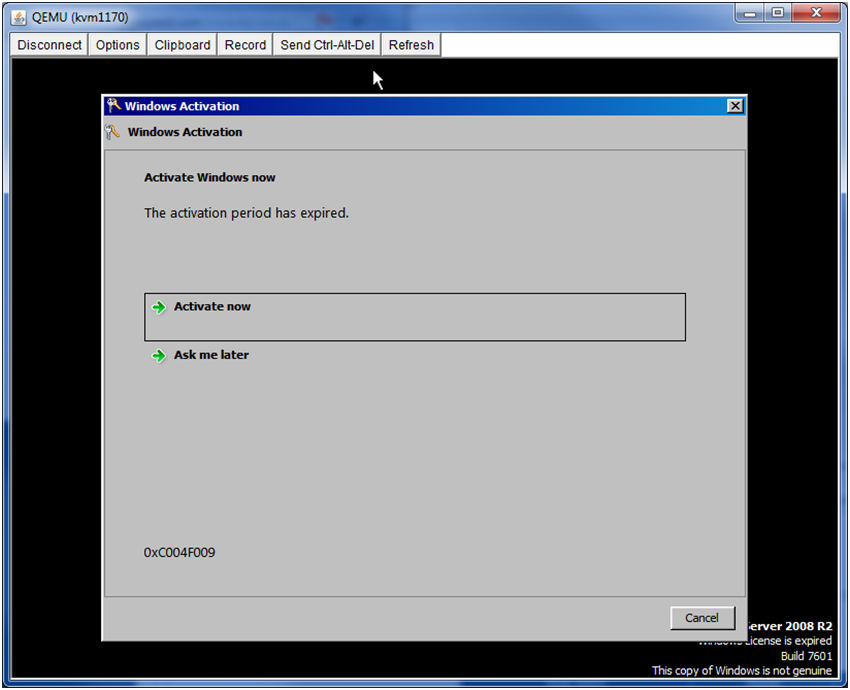
- จะปรากฎหน้าจอตามภาพข้างล่างนี้นะครับ กด Activate now

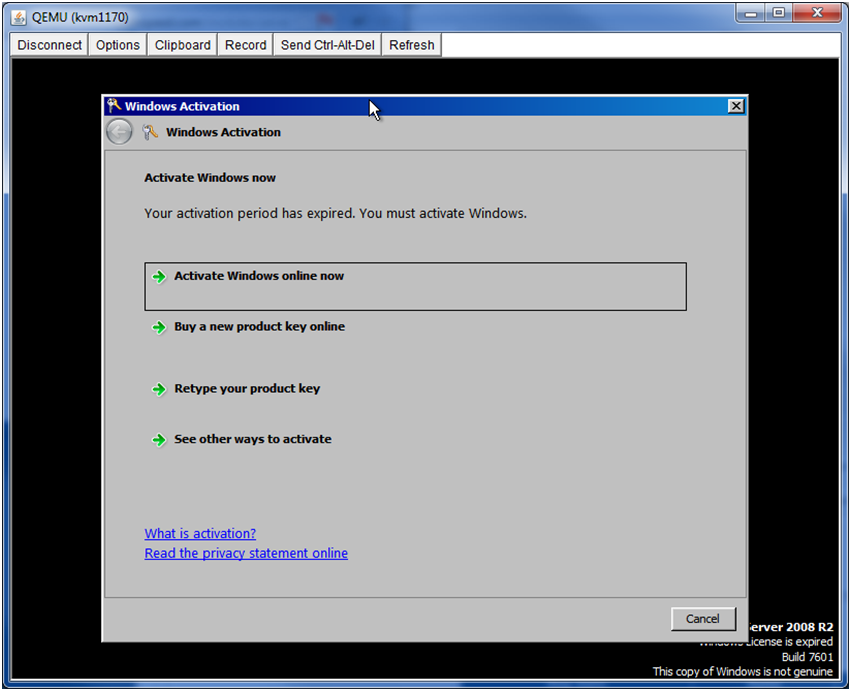
- คลิก ‘Activate Windows Online now’

- จากนั้นระบบจะ Reboot ตัวเอง หรือเราสามารถสั่ง Reboot เองในนี้ได้เลยนะครับ
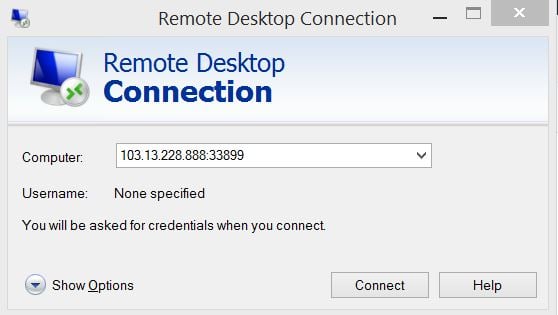
เมื่อเสร็จจากหน้า VNC แล้ว เราก็ใช้โปรแกรม Remote Desktop เข้า VPS ต่อได้เลยครับ
ตัวอย่างเช่น IP 103.13.228.888 คือ IP ของเรา เราก็ใส่ 103.13.228.888:33899
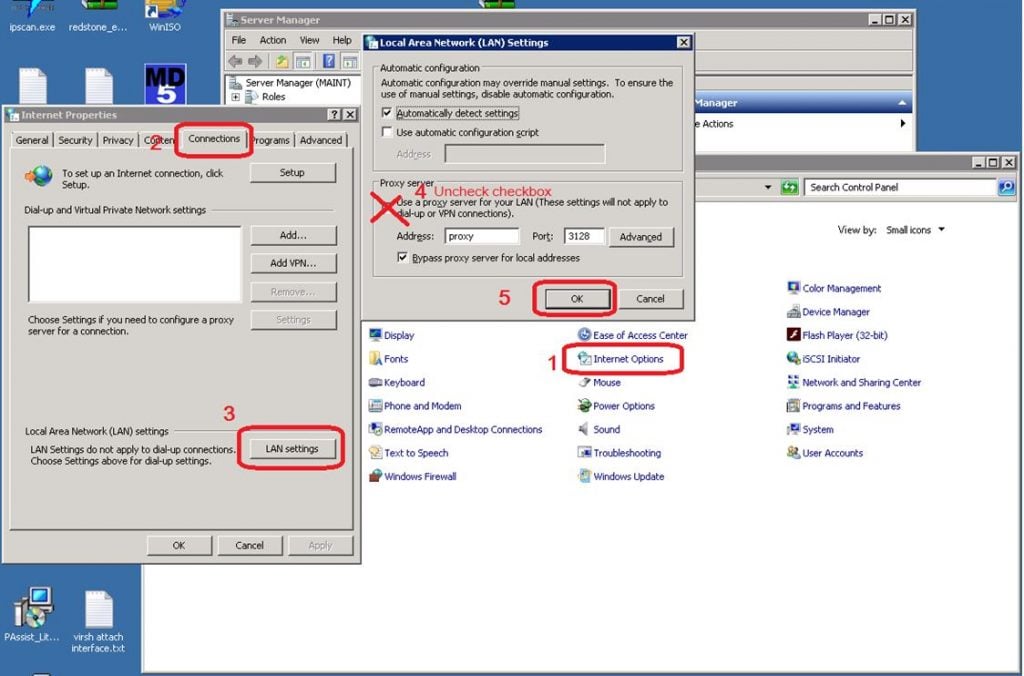
เมื่อ Login ได้แล้ว ยังเหลือขั้นตอนสุดท้ายคือการปิด Proxy Connections นะครับ ตามแบบนี้ :
Control panel => Internet Options => Connections => เอาติ๊กถูกออกตรง Use a proxy server for your LAN
ตอนนี้ VPS ก็พร้อมใช้งานแล้วครับ
