When you ordered a Windows VPS, the server is available 10 minutes after payment.
You can do remote like this:
NOTE: If you ordered your Windows VPS during Thai office hours, then probably we already configured your VPS. You can then skip the steps below.
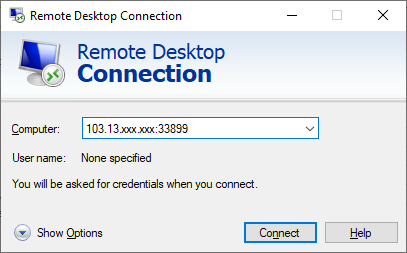
You can check that by starting Remote Desktop on your PC. Use the details that has been sent to you by email called “VPS Host Details”.
If you cannot wait, and you want to start immediately, then use the following procedure to configure your Windows VPS.
- Login in Client Area [Click]VPS => My VPS
- View Details
- Click on VNC
- Click on Launch HTML5 VNC
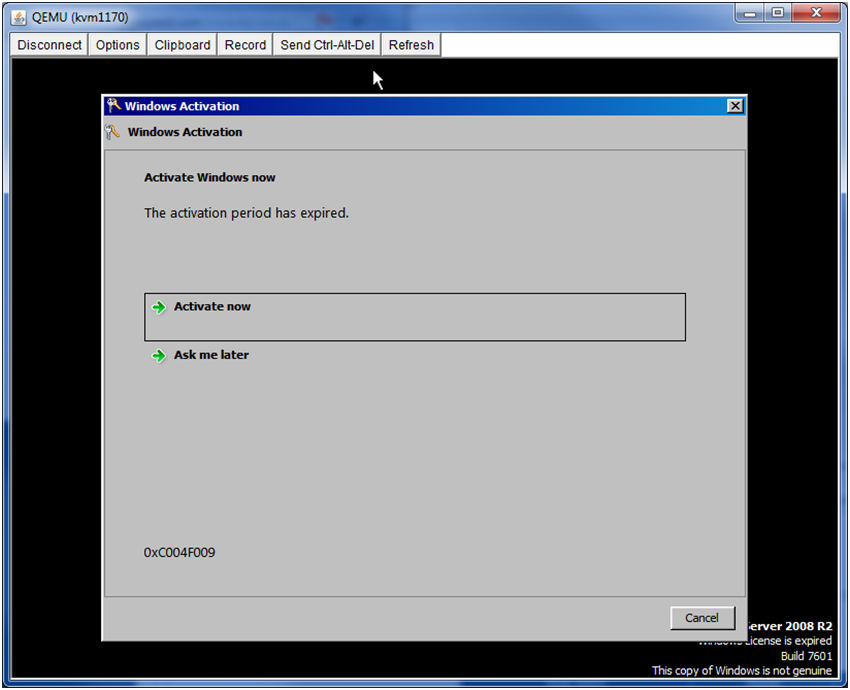
- The following screen appears. Click on Activate now
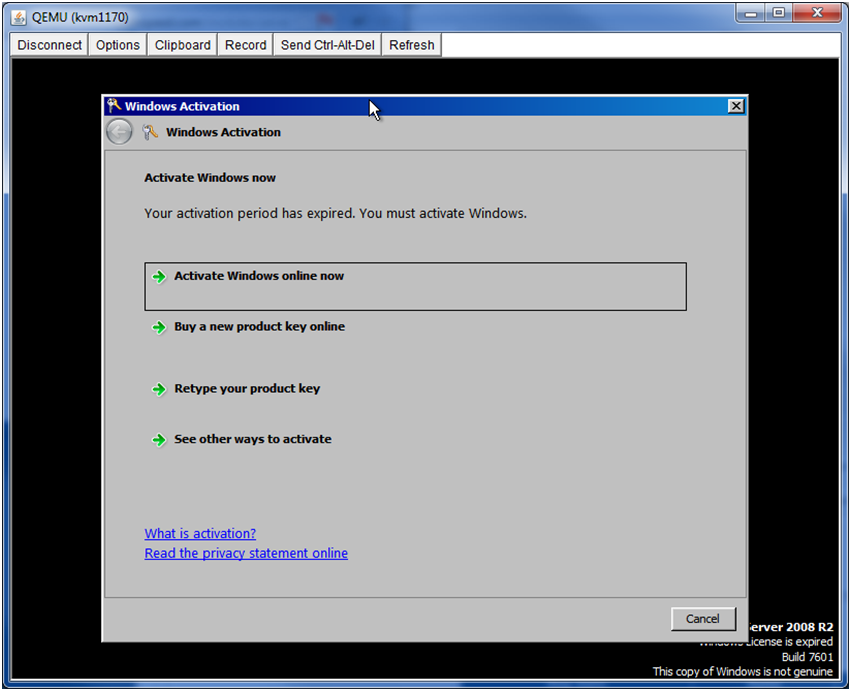
- Choose ‘Activate Windows Online now
- REBOOT your Windows VPS
Connecting to your VPS: See below. The 103.13.22x.xxx is the IP of your VPS
After log in VPS,one more step is disable proxy server :
Control panel=>Internet Options=>Connections=>Uncheck checkbox [see below]
Now your VPS is ready for use.
