สิ่งที่ต้องมี
– Nameserver ของตัวเอง
*หมายเหตุ ลูกค้าที่เช่าโดเมนกับทางเราสามารถเข้าไปสร้าง Nameserver ของตัวเองได้ที่ https://www.cloudhosting.co.th/index.php?rp=/knowledgebase/479/-Name-server.html
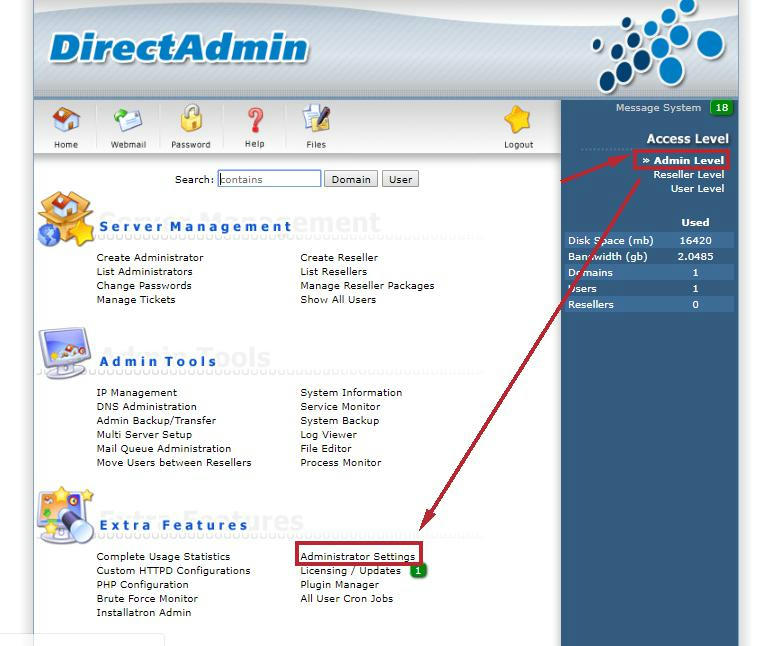
1. เข้า Directadmin โดยใส่ไอพีตามด้วย :2222 เช่น 103.13.229.xxx:2222 แล้วเข้าสู่ระบบ
จากนั้นคลิกที่เมนู Administrator Settings

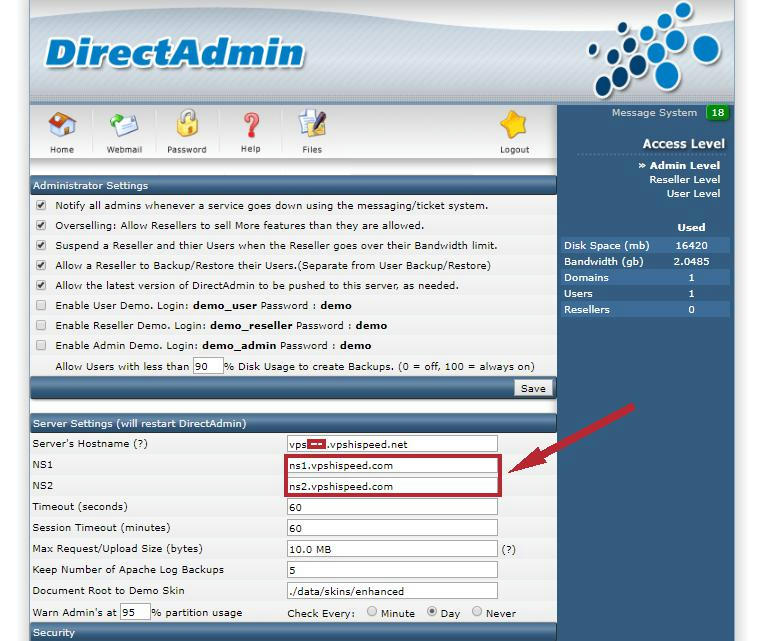
2. ไปที่หัวข้อ Server Settings แล้วเปลี่ยนค่า Nameserver ช่อง NS1 และ NS2 ใหม่
เช่น ns1.youdomain.com ns2.yourdomain.com แล้วเลื่อนลงมาด้านล่างสุดแล้วกด save


